Tag Archives: linux

Setting defaults for the dig command

Today I learned you can set default output options for the dig command by creating a .digrc file in your home directory.

Ordinally, running the command dig www.chaosandpenguins.com, the result is this rather hefty block of text.

$ dig www.chaosandpenguins.com

; <<>> DiG 9.16.1-Ubuntu <<>> www.chaosandpenguins.com
;; global options: +cmd
;; Got answer:
;; ->>HEADER<<- opcode: QUERY, status: NOERROR, id: 40732
;; flags: qr rd ad; QUERY: 1, ANSWER: 2, AUTHORITY: 0, ADDITIONAL: 0
;; WARNING: recursion requested but not available

;; QUESTION SECTION:
;www.chaosandpenguins.com.      IN      A

;; ANSWER SECTION:
www.chaosandpenguins.com. 0     IN      CNAME   chaosandpenguins.com.
chaosandpenguins.com.   0       IN      A       216.92.152.175

;; Query time: 0 msec
;; SERVER: 172.28.224.1#53(172.28.224.1)
;; WHEN: Wed Nov 16 23:13:00 EST 2022
;; MSG SIZE  rcvd: 136

That’s a whole lot of text. So let’s add a couple options. +noall turns off everything. Running dig www.chaosandpenguins.com +noall would literally return nothing at all. To bring back the answer section (which is what I’m interested in most of the time), you add the +answer option.

$ dig www.chaosandpenguins.com +noall +answer
www.chaosandpenguins.com. 0     IN      CNAME   chaosandpenguins.com.
chaosandpenguins.com.   0       IN      A       216.92.152.175

That’s much more compact , but getting it requires some extra typing. And I want that version of the output most of the time, so wouldn’t it be nice if there was to make that the default?

This is where the .digrc file comes in. You create it in your home directory and just put in a single line containing the options you want. So, to make +noall +answer the defaults, I just run this command:

$ echo +noall +answer > ~/.digrc

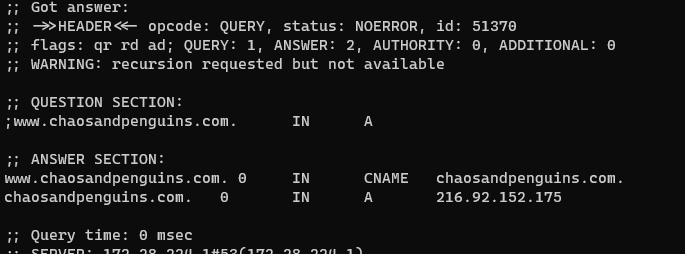
And now when I run dig www.chaosandpenguins.com without any options, here’s the default output:

$ dig www.chaosandpenguins.com
www.chaosandpenguins.com. 0 IN CNAME chaosandpenguins.com.
chaosandpenguins.com. 0 IN A 216.92.152.175
Troubleshooting puppeteer in WSL2

I’m working on a small project to generate image files from HTML using a web browser. This is something I’ve toyed with for a while, but never really dug into canvas far enough. Once I discovered the puppeteer package for node, the dream seemed suddenly within reach.

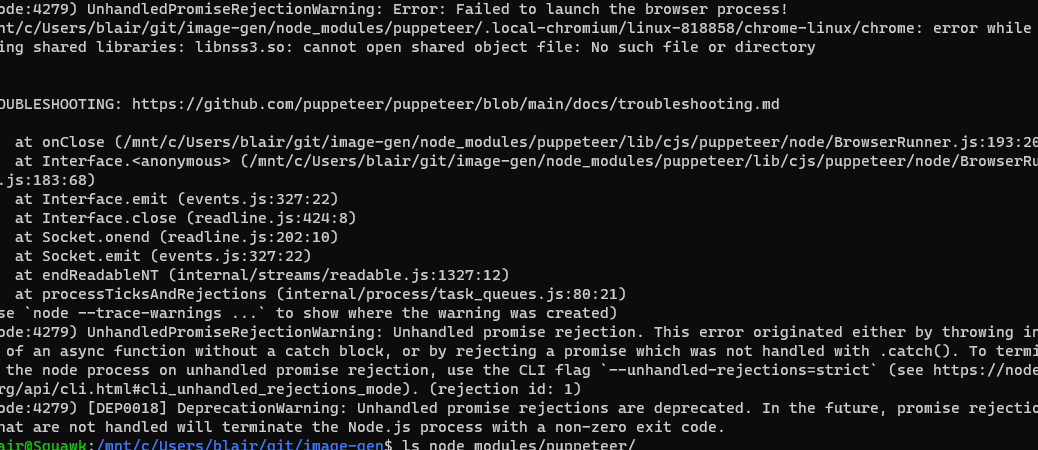
Everything was going along fine, until I got to the point of actually trying to launch the headless browser. Then my program started crashing with the message:

(node:4279) UnhandledPromiseRejectionWarning: Error: Failed to launch the browser process!
/mnt/c/Users/blair/git/image-gen/node_modules/puppeteer/.local-chromium/linux-818858/chrome-linux/chrome: error while loading shared libraries: libnss3.so: cannot open shared object file: No such file or directory

The message included a link to a troubleshooting guide, which did mention some tips for Windows, but that was the Windows GUI environment and I’m using Ubuntu 20.04, running under the Windows Subsystem for Linux (WSL2). That meant it was either fix it myself, fire up a VM, or install node under Windows (which would mean losing the node version manager tool).

One of my main reasons for doing Node development in Linux is the ability to use nvm. A VM is much too heavy a solution for my tastes, so I wanted to see if I could get it working. And off to Google I went.

Searching for the error message is my usual first step, but although it turned up plenty of other people having problems (plus a few open GitHub issues from several years ago), it didn’t offer any solutions. Finally, a search for “puppeter wsl2 libnss3.so” led to a comment on an issue from last June where someone got it running by installing a bunch of packages manually.

0ne of the nice things about WSL is if you break your installation badly, it’s fairly trivial to remove it and reinstall a new copy. So it was fairly low risk to try installing the missing pieces to see if I could get it to work.

The error message even gave me a starting point: “error while loading shared libraries: libnss3.so: cannot open shared object file: No such file or directory.”

There’s a page at https://packages.ubuntu.com/ which allows you to search for which package a library comes from. I started by putting libnss3 in the keyword field and specifying focal (aka “20.04”) as the distribution, and began the iterative process of looking up the installing the missing packages, trying my program again, and then looking up the next failed package. Happily, all it took was a half-dozen tries before my script started working again.

Here’s the list:

libnss3
libatk-adaptor
libcups2
libxkbcommon0
libgtk-3-0
libgbm1

Full-disclosure: midway through, it occurred to me that the reason the packages were missing might be because WSL isn’t a GUI environment and therefore doesn’t have a browser installed. Running sudo apt install -y chromium-browser didn’t solve the problem, but it is possible that this installed some additional packages which I was then able to avoid installing manually.

Now to see if I can get it to render a page. ?

RDP connection to Linux

Going down one rabbit hole or another last night, I somewhat randomly found an article detailing how to install and access a graphical desktop UI on the Windows Subsystem for Linux.

The gist of it is

  1. Update your packages.
  2. Install the xfce4 package and optionally, xfce4-goodies (one imagines this would work for other desktops as well)
  3. Install xrdp
  4. Change the port (the default RDP port is used for connecting to the shell)
  5. Start xrdp
  6. Launch an RDP to localhost, using the new port number.

It’s a neat trick, but I’m not sure how much use I have for it. Most of what I do with WSL (e.g. running various Linux utilities) is command-line oriented. A GUI just adds extra steps. Plus, because of the way WSL works, you have to restart xrdp any time you restart Windows. That’s already a nuisance with XAMPP.

But that one step, installing xrdp. I might have a use case for that. I keep a couple Linux VMs around for things where I do want a GUI, and it’s also a nuisance having to launch the Hyper-V manager in order to connect. If I could just leave the VM running in the background and RDP to it as needed…. that would be helpful.

Sending mail from a script on a Raspberry Pi

I’m working on a project where I need to send email from my Raspberry Pi. Installing a full-blown SMTP server would be overkill, I just need something where I can send messages from a bash script.

A brief search led me to a forum post from 2013 which talked about configuring the ssmtp package. That post in turn referenced a step-by-step guide from 2009. Unfortunately, both seem to be out of date, and the latter is for installing it on CentOS?RHEL/RedHat/Fedora. So here’s my attempt at an updated version for the Pi (which should apply to any Debian-based Linux distribution).

Notes

  • These instructions send via Gmail. If you’re using two-factor authentication (and you really should), you’ll need to set up an application -specific password. Otherwise, you’ll get authentication errors.
  • The password is stored in plain text. This solution is not suitable for use on a shared system.

The Steps

sudo apt update -y && sudo apt upgrade -y
sudo apt install -y ssmtp
sudo vi /etc/ssmtp/ssmtp.conf

Make these changes to the ssmtp.conf file

mailhub=smtp.gmail.com:463
FromLineOverride=YES
AuthUser=Your_GMail_Address
AuthPass=Your_GMail_Password
UseTLS=YES

I also set the root= setting to my email address. I don’t believe this is necessary, but it does allow me to get notified when something goes wrong with one of my messages. (The way I first found out my configuration was working was a message from a cron job which had some unexpected output.)

Testing

Part of the installation is to set up a symlink so that sendmail becomes an alias for ssmtp. You can use either command.

The ssmtp command doesn’t seem to include command-line options for specifying the subject line or the name of the recipient..

So, here’s a command line you can use. Edit the email address as suits your needs. (The sender name and email address will be embedded by GMail.)

Ignore the word-wrap, this is all one line.

echo -e "Subject: Test Message\nTo: Your Name Here <you@example.com>\nThis message was sent via ssmtp." | ssmtp -t

Alternatively, you can put the recipient’s email address on the command line (the message will then be received as a BCC).

echo -e "Subject: Test Message\nThis message was sent via ssmtp." | ssmtp you@example.com

Troubleshooting

Four files are written to /var/logs

  • mail.err – contains an entry for each time there’s a problem sending a message.
  • mail.info – contains an entry for each attempt (successful or failed) at sending a message
  • mail.log – duplicates mail.info.
  • mail.warn – duplicates mail.err.

(Image via Pixabay user Deans_icons used under Pixabay License.)

Finding Your Router’s Public IP Address

It’s easy enough to find your home router’s public facing IP address (the one your ISP assigns) via a Google search; they even make it the first result on the page. But what if you want to find it via a script?

That’s the challenge I’m trying to solve. What’s more, I want to do this without calling something on an external service. I’ll only be looking it up once every five minutes or so, but I’d prefer to not be a nuisance. (And if something goes wrong and my script runs in a tight loop, I’d rather not have the polling hammer someone else’s server.)

I found a script on the Linux & Things blog which almost does what I want. That script doesn’t quite work for me though, my route command doesn’t flag the default gateway.

But that’s OK, the bulk of what that script does is to look up the local network’s name for the router. That’s a nice bit of robustness, just in case the router’s name does change for some reason (e.g. switching from Fios to Comcast, you’d get a new router and the new router would likely have a different default name). But for my purposes, it’s good enough to know that the router’s name is always going to be Fred. (No, not really, that would be silly. My router’s real name is Ethel.)

So from a bash prompt, we end up with this snippet of code:

external_address=$(nslookup Fred.home | grep Address | tail -1 | awk ‘{print $2}’)

That one-liner really breaks down to five parts.

nslookup Fred.home looks up Fred’s entry in the local DNS. What I get is something similar to:

Server: 192.168.1.1
Address: 192.168.1.1#53

Name: Fred.home
Address: 192.168.1.1
Name: Fred.home
Address: 172.217.8.14

Now none of that’s my real network information, but what we’re after is that last “Address” line.

Piping the output of nslookup through grep Address throws away every line which doesn’t contain the word “Address”, leaving this:

Address:        192.168.1.1#53
Address: 192.168.1.1
Address: 172.217.8.14

Getting closer, next, it gets piped through tail -1 which grabs just the last line:

Address: 172.217.8.14

Excellent! That’s almost what we want.

The next step in the chain is to run it through awk '{print $2}' which uses the AWK tool to output just the second token in the stream.

Finally, the entire thing is wrapped in the $() operator, which captures the output of those four steps and allows us to assign them to the

external_address

variable, which allows the external address to be used elsewhere:

external_address=$(nslookup Fred.home | grep Address | tail -1 | awk ‘{print $2}’)
echo $external_address
172.217.8.14

This (obviously) runs at a bash prompt. I’ve tried it out on Ubuntu and the Windows Subsystem for Linux, though I can’t imagine it wouldn’t work on other distributions as well. Most of the magic in this is text parsing. The Windows version of nslookup provides similar output, just formatted differently; there’s no reason a PowerShell script couldn’t do some similar processing to find the address.

Raspberry Pi Beginners Guide

Another entry from the land of “So I can find it later….”

Setting up the Raspberry Pi set was easy enough, and installing Chromium (the open-source version of Chrome) only took a single command (apt-get install chromium). When I was using it to post “Hello World” on Facebook, I discovered that the @ and ” keys were reversed (the physical keys were in their usual locations, but their behaviors were backwards). OK, the keyboard mapping isn’t set for the US. (The Pi and the drive image I’m using are both from the UK.)

I was pretty sure I could fix it via the configuration program that runs when you boot the first time, but there were two problems: (1) the configuration program only run automatically on the first boot and (2) I couldn’t remember the command.

Searching for raspberry pi configuration program led to the link RPi Beginners which looks to chock-full of useful information if (like me) you’re just getting started with Linux and/or the Pi. (For example: Backup your SD card.)

By the way, the configuration program is raspi-config; you’ll need to run it as sudo raspi-config.

Installing Ubuntu without pae

From the land of “things I might want to refer to later….”

My old Dell Inspiron works fine except for a missing ‘R’ key. Windows XP is showing more signs of age than the notebook, so time to put another OS on it.

I’ve been using Ubuntu in such situations, but my attempts at installing both 12.04> and Lubuntu (lightweight Ubuntu) have both ended with a message about the hardware not supporting the required pae extensions.

Physical Address Extension (aka pae) is an Intel technology which allows a 32-bit operating system to access more than 4 GB of RAM. (A quick read suggests it essentially hands each application a 4 GB chunk of memory, similar to how programs on the 80286 and earlier chips were able to address more than 64 KB at a time by combining a 16-bit memory address with a 16-bit segment address — and by revealing that I know about this, I’ve probably dated myself quite handily.)

Another quick search on Google turned up a relevant pair of AskUbuntu Questions describing how to install a non-PAE version.

In a nutshell:

  • Download the non-pae netboot image mini.iso. This is a bare-bones installer which downloads the selected packages during the installation process. (Obviously, this requires a broadband connection.)
  • Burn the image onto a CD* and boot the computer from that.
  • Accept the default values for most of the prompts. You’ll need to supply a userid and password. My experience is that it’s faster to select the keyboard layout from a list then to go through the prompts for “detection.” (Faster for a standard US keyboard anyhow; your mileage may vary.)
  • At the final screen, when prompted for packages to install, be certain to select a desktop (e.g. Ubuntu Desktop) unless you plan to do everything from the command line.

* The Inspiron’s CD drive is getting old and unreliable, using UNetbootin to make a bootable thumb drive worked perfectly.

Experimenting with the PogoPlug

I’ve had a PogoPlug for a little more than a year.

The pluses to the device are:

  • It’s an easy way for a home user to convert old drives into network attached storage
  • You can access your files from anywhere you have an internet connection.
  • Drives connected to the device appear as local drives (even across the internet).
  • It can convert video files to play on (supposedly) any device.

There are some down sides too:

  • The video conversion is slow (not completely unexpected with a low-power, always-on device)
  • The client software requires a new login after every boot.
  • The attached drive sometimes “disappears” until you tell the software to “reload” it.
  • My experience with the Android application has been that it’s a bit flaky.

All in all, it’s an interesting device and I can definitely see where home users might find it useful if they’re comfortable with the fact that you need to login via a third-party service (the My PogoPlug service), even when you’re accessing it a home.  (If Cloud Engines ever goes out of business, PogoPlug owners may find themselves with an unusable device.)

Part of my reason for acquiring the PogoPlug in the first place was that it seemed like a potentially inexpensive way to accomplish a few things on my home network:

  1. File sharing between my various computers.
  2. Running a private web server I could access without switching the main computer on.
  3. Running a private subversion server.

Goal 1 was easy enough to accomplish straight out of the box.  Goals 2 and 3 were going to take some work.

When I finally decided to hack the PogoPlug, a Google search led me to LifeHacker’s tutorial on turning the device into a “Full-Featured Linux Web Server.”  It was a good starting place, but in the end I decided to follow the source instructions from PlugApps.com.   (CAUTION: As it says on the PlugApps instructions, hacking your PogoPlug will void the warranty.)

My initial install was onto a 4GB SanDisk Cruzer flash drive.  The initial reboot came up fine, but later boots tended to come back to PogoPlug Linux,  which after the first steps of the install would no longer connect to the MyPogoPlug service. If I manually mounted and mounted the thumb drive  before running /sbin/reboot, that would take me over to PlugBox Linux, but going through those steps repeatedly is a pain.  I reran the install for PlugBox Linux using a no-name 16GB drive and it’s been working reliably ever since  (I love that storage has become so cheap that I had a 16GB drive “just laying around”).

To accomplish Goal #1 (file sharing), I installed Samba.  It works like a champ and I’ve been able to back to doing my backups to a network drive.

To accomplish Goal #2 (private web sever), LifeHacker’s instructions did the job.  By default, the web site is served out of /srv/http, and there’s also an ftp site in /srv/ftp.

Goal #3 took some guesswork. I didn’t see any mention of Subversion on PlugApps, but I made a guess and ran  pacman -Sy subversion.  I haven’t got around to setting up svnserve to run as a daemon at boot time, but it’s running right now.  (Getting it set up as a daemon will require putting a script in /etc/rc.d/ and adding it to the list of daemons at the end of /etc/rc.conf.)

So mission accomplished.  Not bad for a $100 device.